Do you want to increase the download speed of your computer? Everyone is constantly looking for information to improve his career. No doubt, information is the highway to greatness in life. In a bide to obtain such information one is forced to get it whenever it appears online. One is please and satisfy with the rate of such information transfer if it is very fast. But the reverse is case when the data transfer ( i.e. bits or bytes per second ) is very slow. One is bound to waste time to be used for other demanding issues on a slow data transfer. But you can get out of this mess and speed up the rate of data transfer of your computer by applying the tips in this article.
Change or upgrade your connection. Your internet service provider render service according to your subscription. There is a limit speed associated with each connection. So, go for subscription that meet up with your need. If you are using dial-up connection, make use of Broadband connection for faster speed output. The broadband has Direct Service Line ( DSL) or a cable connection to be chosen for maximum performance.
Download single file per time. Running multiple tasks on a computer at the same time generally slow down it speed. You can give preference to the file to be obtained in order of its priority attention.
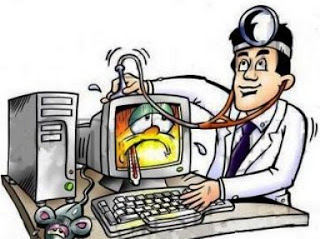
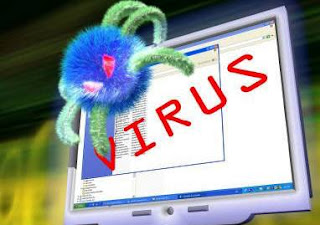
Always scan your system with good and powerful antivirus. When there is any virus effects on your systems, it will affect the entire operation carry out on it including the speed of your computer.
Always maintain healthy window registry. Virtually all activities of your computer is center around the registry. It holds the setting and option needed for computer to run effectively. Any alteration in its code setting affects its performance. But you can not avoid activities that affect the registry. Activities such as installation/uninstallation of programs or configuration change have greater effect on the registry. They deposit invalid entries on it and slow down overall performance of the registry. So, you must regularly clean the registry. Registry cleaning can be done manually or with aid of a software. Manually clean is only good for experts who will not delete valid entries and infuse damage to the system.
If you are not expert, it is advisable for you to get a registry cleaner install on your PC. It will scan and free your computer from junk, obsolete and corrupt files. Back-up facilities is available on it to restored any deletion made in error. Basically, it will speed up the data released from your computer.
Franking speaking, application of this software is the most essential tips to fastest information transfer from any internet connection.
Do really want to increase the download speed of your computer? Then, get excellent registry cleaner who will not only increase the download speed of system, but it will increase the overall performance of your system.
Friday, August 20, 2010
Tuesday, August 17, 2010
Thursday, August 12, 2010
Tuesday, August 10, 2010
How to avoid Website Hacking?
 Website creation is a very popular activity on the internet. As more and more people discover the many possibilities of having their own website, more of these pages are being created on the internet. It is essential that a website is created in more than just a way that is attractive to visitors. It should also be protected in such a way that there is a higher level of security. There are many individuals who actually spend a majority of their time hacking various websites online. In this article, you will learn about the importance of website hacking prevention measures.
Website hackers use numerous kinds of computer programming languages in order to break down the security on websites on the internet. The most popular computer programming language that can be invaded is that which uses XXS. This is a cross scripting type of computer language that is often used to cross websites. When creating your online website, it is essential that you ensure that all fields and other areas of the website are properly protected from the potential hacker.
Many website owners have a special area on their website where they attempt to gather personal information from the visitors. This may include gathering an email address, an address, and other types of information. It is important that this part of the website is properly protected from hackers. Not only can this type of hacking jeopardize your website, but it can also jeopardize the personal information that your visitors enter on the website. It is important for you to make sure that this part of your website is properly encrypted by HTML.
Many website hackers engage in a practice that is commonly referred to as "Google Hacking". Individuals who use this type of hacking often attempt to discover information about a particular website that is listed on Google by searching for information that is normally considered to be unauthorized. They will attempt to retrieve information that pertains to the tracking tools that are often used by website owners. This information, when in the wrong hands, can actually jeopardize your website.
Individuals who gain access to information on a website through Google hacking techniques may get access to the following information:
- The cache of the website
- Various types of files that are listed on the website
- The link that is used to promote the website
- The intitle and the inurl may also be accessed
Many website owners create their website in such a way that they can access the information across many platforms. However, this can prove to be a danger when it comes to website hackers. By using Google hacking techniques, the pages that are on the website can be easily hacked because the pages are often available for editing purposes. If there is a query made into the search engine, these pages can easily be accessed. If a hacker accesses this information, they can do virtually anything to your website pages. This can prove to cause you financial loss. This is especially true if the hacker places information on your website that can hurt your reputation.
Luckily, there are many techniques that website owners can use to prevent the possibility of hacking. First, the data that you use to compile your website pages should never be allowed to sit on a server. This information should be saved locally. This means that it should be saved to your computer. In turn, you should make sure that the computer is protected by a password that contains alphanumeric characters. This way, if someone attempts to access your computer system remotely, they will be unable to do so.
You should also ensure that the password that you use to make changes to your website is also secure. When saving the documents that are part of your website, it is important that you create them in such a way that others are unable to access this information. Many tips for this include integrating a "disallow" function on the website and attached to all the documents. By taking these steps, and being aware of what the dangers are when you do not, you are sure to prevent the possibility of hackers.
Source: ezinearticles
Monday, August 2, 2010
How to access the sharing data offline?
Access the shared data offline allows you to keep using your shared files, folders and software programs when disconnected from the data server. When you reconnect to your data server, all files will be synchronized to the files on the network.
There are two types of configurations required to set the access shared folders offline available, one for data server and other for client computer.
Configuration on Data Server
There are two types of configurations required to set the access shared folders offline available, one for data server and other for client computer.
Configuration on Data Server
- First locate the folders that you would like to share or make new folders then share these folders so they can be accessible to any one on the network.
- Now right click on that folder and click on the option "Sharing and security".
- A small dialog box will appear with the title "data properties". Under the "Sharing" tab, select the check box "Share this folder on the network" under the "Network sharing and security".
- Now set the share level permissions that you want to give the users on every folder. Enable cache of share folders by click on cache button (by default it will be enabled).
- On the client computer, first open My Computer then click on Tools.
- In Tools menu bar, click on Folder Options, a window will appear with the title Folder Options.
- Under the Offline File tab, check the option Enable Offline File. Here you can choose the synchronization process "Synchronize all offline files when logging on", "Synchronize all offline files before logging off" and others.
- Click on Apply button to save the settings and then Ok button to close this window.
- Now sitting on the client computer, try to access the shared folder from the data server.
- First Right click on the shared folder and Click on Make available offline.
- To synchronizing the offline work from client computer to data server, again open My Computer then click on Tools. Click on Synchronize then click on synchronizing button.
Wednesday, July 28, 2010
Friday, July 23, 2010
How to Make Your Computer Live Longer?
 Sometime I think losing a laptop is almost as traumatic as losing a pet. You spend so much time and effort getting to know what it, trying new things. You waste hours of your life playing with it. It even follows you around.
Okay, so I might be pushing the analogy, but the truth is, most of us don"t have the money to get a new laptop every 6 months. We"d like to keep the one we have alive and running for as long as possible.
So here are a few useful little tips that might extend the life your computer. Don"t worry, you probably already know them, but reminders never hurt anyone:
1. Shut it Down: This may sound simple but many of us just close the lid, turn of the monitor or set it to sleep mode. Completely shutting your computer down will keep it from overheating and leaking memory. Think of your computer like your brain, it can"t function without a good night"s sleep.
2. Defrag!: Again, another simple "duh" moment. Defrag your computer. Most PCs will even let you set up a regular defrag schedule once a week. Cleaning up your files on a regular basis will also keep your computer functioning at optimal speed.
3. Keep it Clean: During your regularly scheduled defrag, go ahead and run a scan for viruses, spyware, malware, all that bad stuff you can pick on the internet. Find a good program to keep your PC"s health good.
4. Don"t Drop It: Look, be nice to your laptops. Keep them in safe places, don"t expose them to weird temperatures and be sure not to eat or drink near them if possible. Also pets. I lost a laptop a few years ago to a cat pouncing on and then hairballing all over my keys, it broke my screen and something gross seeped into the circuitry. Trust me, helping your computer and your pets avoid each other is a good idea.
These might not be the most enlightening tips, but they"ll go along way in keeping your computer chugging along for an extra year or so.
Do you have tips for adding an extra life to your laptop?
Source: technology-blog.com
Monday, July 19, 2010
How to Protect Against Phishing Scams and Fraudulent Email?
 Phishing scams and fraudulent or "fake" emails are designed for identity theft by internet scam artists. A 'phishing' email is one that pretends to be from a company or bank like eBay, PayPal, WAMU, Suntrust etc, and which asks you to enter your account data, such as login details. These scams are often supported by fake spoof websites, and victims are tricked into thinking they are logging to a real website. Phishing is a form of identity theft, where fraudsters steal your identity and personal information to gain access to your accounts or commit other crimes using your persona. These scams can be found everywhere on the Internet ranging from commercial websites, social networking sites and even your email account. Follow the steps below to learn how you can protect against phishing scams and fraudulent emails.
- Limit the information you post on social networking sites. Scammers surf these websites to locate personal information such as email addresses, habits, location and other data. Fraudulent emails are then created based on this information asking for additional personal information, credit card numbers or emails containing links to scam websites.
- Delete emails sent from unknown internet addresses even if they appear to come from legitimate sources. This is especially true if they contain time limits or relay a sense of urgency. These are attempts to convince you there is something wrong with your banking or other financial accounts so you will email your personal information or link to a phishing website where you will enter your information. Also unknown emails can release viruses, Trojans, and spyware onto your computer that can collect additional personal information and send it to the scammer.
- Check the links in every email you read before you click on them. When you place your cursor over a link an additional link appears in the bottom lower left bar on your screen. Compare the two link addresses, and if they do not match exactly do not click on the link. Phishing scams usually start with fraudulent emails with fake email links meant to direct you to the scam site.
- Update your anti-virus, spyware, firewall and anti-spam programs on a regular basis and perform routine scans of your PC or laptop. This should prevent most phishing scams and fake emails from ever reaching your computer.
Source: ehow.com
Thursday, July 15, 2010
How To Remove The Google Redirect Virus?
 Google redirect virus is most recent virus on Internet and it affects browsers mostly. It is made to maneuver Google search results. Virus installs via Trojan and while searching on Google, It conceals Google results and displays advertisements or associate links associated to that topic. Google redirect virus even displays fake advertisements, pop-ups; transmit spam pages and much more. It doesn’t allow searching on Google and it is a indication that to protect PC in future by via a Spyware Remover.
• To delete Google Redirect Virus, first know what this threat is and how it harms PC? The malware lives up to its name and carets redirection of search results. While searching onGoogle, virus redirects to other wrong websites and advertisements. It allows seeing expected results from Google. And also, this virus do the following:
1) It displays errors prompting filename.exe is invalid WIn32 application.
2) If downloading and attempting to install a new application, it might prompt that setup files are corrupted. It keeps on bugging over and over.
3) It infects Web browsers and then redirect to malicious websites containing advertisements and pop ups.
• It is very crucial to delete Google Redirect Virus as soon as possible To delete Google Redirect Virus, follow blow given steps:
Go to Start menu open Run. Enter "devmgmt.msc" and Press OK button. Device Manager will come up. In Device Manager, select "View and click on Show Hidden Devices".
• Press "Plus" symbol. Then disable "TDSSserv.sys". Ensure not to click on Un-Install option otherwise infection will be back after restarting PC.
Source: techfuels.com
Wednesday, July 14, 2010
What is Phishing and How to Protect Yourself from Email Phishing Scams?
 Phishing is an e-mail fraud method in which the perpetrator sends out legitimate-looking email in an attempt to gather personal and financial information from recipients. Typically, the messages appear to come from well known and trustworthy Web sites. Web sites that are frequently spoofed by phishers include PayPal, eBay, MSN, Yahoo, BestBuy, and America Online. A phishing expedition, like the fishing expedition it's named for, is a speculative venture: the phisher puts the lure hoping to fool at least a few of the prey that encounter the bait.
Here are some simple steps to protect you from email phishing scams.
- When you receive en email in your inbox from unknown source, do not respond to it or click any links in the email or even download any attachments. Sometimes even opening the email alerts the spammer or put your computer at risk. Delete the contents of your Spam or Junk folder.
- Do not open links from emails even if it comes from a trusted source or friends. You are not sure if your friend's email had been hacked and sends a mass email to every contact in the list. If you click the link, you might be the next victim of the spammer.
- Do not click or download images from an email. Images can actually be harmfully coded that can be used by spammers to determine active email accounts that they can send phishing scams. Although most email providers are default to automatically block these images or better known as "Web beacons", you still have to handle image attachments with extra caution.
- Delete any email that is asking for your personal information, unsubscribe, or forgotten passwords. These types of emails should not be generated unless you asked for it from the website itself. If you happen to accidentally click the links and opened a pop-up window asking you to enter any information, close it immediately. Never ever enter your personal information in a pop-up window unless you are working on a legitimate website at that time.
- Update your antivirus software and your operating system for patches that helps protect your computer from these fraudulent attacks. Email phishing scam is only one of the many activities by cyber criminals to steal information from you so protect yourself by becoming aware.
Sunday, July 11, 2010
How to Remove AV Security Suite from your Computer?
 If you are experiencing a perceptible dip in the performance of your PC, and your Internet connection has suddenly become spotty, you may have malware on your PC. Have you recently installed AV Security Suite? If so, then you definitely have one virus, as this supposed antimalware software is actually a virus in disguise. Because it is a virus, is does do real harm, and because it's a virus, it can be quite difficult to remove AV Security Suite. While the option to uninstall AV Security Suite will actually appear in the change/remove programs portion of your control panel, it won't do you any good.
What is so scary about this type of virus is that there are so many of them out there. In this case AV Security Suite removal has proven particularly difficult. It writes itself into several directories of your computer and spreads fast. The virus' main purpose is to steal your private information so that it can be sold. It slows down your PC and your internet connection in the process.
An ounce of prevention is worth a pound of cure, really does apply in this case. If you don't want to have to delete AV Security Suite, then don't get infected by it. To prevent infection you should avoid these things:
* Browsing new and obscure websites- Many websites are set up specifically to hijack your browser.
* Opening email with strange, generic subjects - these are often from people you actually know, if the message is not explicitly personal, you may want to ask your contact about it through other means before opening it.
* Avoid using P2P software- The files you download using such software come from a "swarm" this means that your PC is open to several users who may not all have virus protection.
If you have been infected, there are two ways to remove AV Security Suite; you can do it manually, by deleting all the files the virus has copied onto your system. There will be virus associated files with.exe,.bat,.dll, and.lnk extensions. You need to delete all of the ones related to the virus, but you mustn't delete any other file of this type or you could render your PC unbootable. Next you need to do a registry hack, you need to seek traces of the virus out in the folders HKEY_LOCAL_MACHINE and HKEY_CURRENT_USER. Again though, care must be taken not to delete anything but the virus related files.
Not too many people opt for manual removal as it is complicated and risky. The safer, easier and more effective method to get rid of AV Security Suite is with a reputable virus remover. This will not only thoroughly scan your computer and eliminate the virus, it will also provide sustained protection.
Tired of viruses infecting your computer? Want to surf the web with the peace of mind that your computer is safe and secure? Get your free scan from the top virus protection and remove AV Security Suite.
Thursday, July 8, 2010
How to Keep Your Computer Running Like New?
 There are a few steps you as a computer owner can take to keep your computer running like new. This months post will walk you step by step through a few easy processes you can take to clean up a slow machine or keep your new machine running as if you just bought it.When you buy a new computer it is loaded with very few programs and is optimized out of the box. As soon as you start installing new software you begin a slow process of slowing down and clogging up your computer.
Step 1. Run disk cleanup once a month
Here is the process to run this utility - Click on Start>point to Programs>Accessories>System Tools>click Disk Clean Up. The utility starts to calculate the files that are available to delete. After a small wait you will see a second window pop up. Check all boxes and click next. Disk cleanup removes all files you specify and leaves you with a clean machine.
Step 2. Run disk defragment every 90 days
You will find this utility in the same location Start>point to Programs>Accessories>System Tools>click Defragment. This utility takes all the files, software, etc. that you have installed and reorganizes them in order to speed up the time it takes your computer to find what you ask it to.
Step 3. Make sure you have an Anti Virus and keep it updated
There are a few recommendations.
Free - Malwarebytes Anti-malware, Panda Cloud Anti Virus, AVG Free, Avast
Paid - ESET internet security, Norton internet security, AVG, Panda
Keep in mind, free anti viruses keep your computer clean but lack a lot of the security features of a paid version. Such as firewalls and USB scanners.
Step 4. Keep your computer up to date
Make sure all software is updated, this includes Windows, Java, Adobe Reader and Flash Player. Your computer is set up to automatically install these updates but if you see a request for attention pay attention and run the updates.
Keep in mind this is a basic list of just a few ways to keep your computer running well. This in no way is all inclusive and there are many utilities you can use to accomplish these steps and more. Also keep in mind that the sites you view also play a large roll as to the health of your computer.
Wednesday, July 7, 2010
How to Save User name and Password in dial-up connection using Windows 7?
Start by clicking the Start button found at the lower left-hand corner of your screen (in Windows 7, the start button is a circle with the Windows logo on it). Click on Computer and select Network and Internet on the window that appears.
Select Network and Sharing Center. Once done, click on the Set up a new connection or network option to launch a new window and begin creating a new dial-up connection.
Select the Connect to the Internet icon on the options available and click Next. You will then be asked for the internet connection type you want to setup. Select Dial-up.
Type in the details to connect to a dial-up network. You may need to contact your ISP to acquire this information. You will need to key in the dial-up access number as well as your username and password on the available fields. You will also be asked to specify a connection name (this is good if you have more than one dial-up account configured in your computer).
Connect your computer to an available phone line. Your laptop should have a phone jack slot available. Simply plug in any regular phone line to your computer and the other end on a phone wall jack to prepare it for connection.
Click the Connect button on your computer wait for it to establish a connection. You will hear your computer emit a weird sound (this is called the "handshake") indicating that it is trying to establish a connection with your ISP. Once your computer has established connection, you are now ready to use the computer to jump on the internet superhighway.
Monday, July 5, 2010
How to Remove Sysinternals Antivirus Completely?
 1) Firstly you need to go to Start, and then to your Control Panel.
2) Once there, find, select and click the Add/ remove Programs button.
3) Once you've did that you'll now see a huge list with all kind of programs that are installed on your computer. Scroll down the list until you've stumbled on Sysinternals Antivirus Messenger and select it.
4) Once selected you only have to hit the remove button and the removal process begins.
What is Sysinternals Antivirus?
Sysinternals Antivirus is a poor imitation of anti-spyware software. Do not buy or download it unless you want to waste your time and money for a computer parasite.
Sysinternals Antivirus it designed to look like a regular security application. However, the looks don't make it functional. Sysinternals Antivirus is able to fabricate infection alerts and system scan reports. It constantly loads the fake messages that make it difficult to use the compromised computer normally. The pop-ups are meant to scare victims into purchasing the rogue program. Sysinternals Antivirus may redirect web browser to websites that promote the tool. It may also block or limit internet access. Sysinternals Antivirus malware as soon as possible.
Why you get Sysinternals Antivirus?
Many users do not know how their computers are invaded by Sysinternals Antivirus until their PCs are in bad performance. Actually, in many cases, it is the users themselves who bring malicious into their PC, not anyone else! Why do I state this point? You know that many people know little about how to maintain computer security and the possibility of getting infected while surfing the net. They just browse any website they like or download everything they want online but never think about the safety! If you also do like this, you need to take the following actions.
How to remove Sysinternals Antivirus?
1. Restart your computer. As your computer restarts but before Windows launches, tap "F8" key constantly. Use the arrow keys to highlight the "Safe Mode with Networking" option as shown in the image below, and then press ENTER.
2. Open Internet Explorer. Click on the Tools menu and then select Internet Options.
3. In the the Internet Options window click on the Connections tab. Then click on the LAN settings button.
4. Now you will see Local Area Network (LAN) settings window. Uncheck the checkbox labeled Use a proxy server for your LAN under the Proxy Server section and press OK.
5. Download an automatic removal tool and run a full system scan.
A highly recommended tool to remove Sysinternals Antivirus is RegistryQuick which is available for free at Registryquick Before you try other programs, give RegistryQuick a try! You will be surprised!
Thursday, July 1, 2010
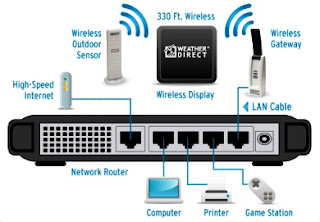
How to Block Hackers on Your Wireless Home Network?
 Do the terms LAN, Network, Wireless or Security send you running toward the hills? You're not alone. Many people would rather carry on with their carefree web surfing at home than worry about this important aspect of wireless internet. Don't be fooled, hackers are a major threat and can do tremendous damage to your computer or even steal personal information. adding two simple things to your wireless home network can stop virtually all external hackers.
Follow the steps to secure wireless internet from Hackers:
- A router and home network setup is typically used for directing your DSL internet line to one or more computers in your home. Each computer will need a network adapter with a plug that accepts the network cable. In the case of wireless internet, each computer will need a wireless network adapter with an antenna instead of a cable plug. Follow the equipment instructions for installation and then use the Windows home office network setup wizard.
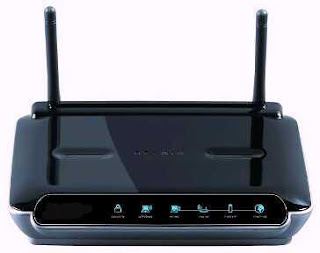
- Throw away your WEP router. It is a well-known fact that a router using the older technology called WEP security type can easily be hacked in less than 10 minutes, no matter how strong the password is set. Do not use any router unless it provides the latest WPA security type.
- Invest in a WPA router and network adapter. Most experts agree that the newer technology called WPA or WPA2 are the optimum choices to ensure the highest level of security for your wireless network. Be sure to get a WPA network adapter for each computer that you are going to have hooked up to the wireless network. Two of the best brands are LinkSys and D-Link.
- After you have installed your new WPA router and network adapter and performed the Windows home office network setup wizard, you will need to configure your router using the admin tool and instructions provided by the manufacturer. As part of the wireless setup, be sure to select the WPA security type. You will also be asked to set a password or security key.
- Use a hack-proof password for your wireless security key. This means it must be at least 10-digits, alpha-numeric, and totally random. There are no exceptions to this rule. It is a well-known fact that using this type of password would take 1,000 computers 500 years to break the code and hack into your computer. Use letters and numbers and make sure not to use words in the dictionary or even made up words. Example: dL7k945fjP
- To recap, use a WPA router and the strongest alpha-numeric password. Finally, wireless home networking is no longer a mystery. If you do these two simple things, you can sleep easy at night knowing that your wireless home network is protected from external intruders. Forget the myths you may have heard about using MAC filtering, blue tooth or positioning your router in the center of your home.
- This keeps virtually all hackers out of your wireless home network, but does not address internet hackers that can break into your computer while you are browsing the web. Certain websites or emails can infect your computer with a virus, and other spyware can steal your personal information. Therefore, it is imperative that you get a good anti-virus/firewall software to protect your computer while you are using the internet. The top brands include McAfee, Norton, and Panda Security.
How to Stop Hackers from Invading your Network?
 Unethical hackers are always looking for weaker points in a network system to hack the security system of your company and get hold of confidential and new information. Some such "black-hat hackers" derive a vicarious pleasure from wreaking havoc on security systems and some hackers do it for money. Whatever may be the reason, malicious hackers are giving nightmares to companies and organisations of almost all sizes. Especially, large corporate houses, banks, financial institutions, security establishments are favourite targets for hackers. However, this menace can be prevented to a great extent if proper security measures are taken at the right time.
- Some such "black-hat hackers" derive a vicarious pleasure from wreaking havoc on security systems and some hackers do it for money. Whatever may be the reason, malicious hackers are giving nightmares to companies and organisations of almost all sizes. Especially, large corporate houses, banks, financial institutions, security establishments are favourite targets for hackers. However, this menace can be prevented to a great extent if proper security measures are taken at the right time.
- Install proper scanning software programs to identify all entry points from the internet into the internal network of the company. These points have the weakest security controls which a hacker can easily target. Identifying these entry points, however is not at all an easy task. It is better to take the help of skilled ethical hackers who have taken special network security training to perform this task successfully.
- By running the attack and penetration tests, you can identify those vulnerable points in the network that can be easily accessed from both external and internal users. After identifying these points, you would be able to thwart attacks from external sources and correct the pitfalls that could become the entry points for intruders to hack into your network. The test must be done from both the internal as well as external perspectives to detect all the vulnerable points.
- All possible steps must be taken to make all the users of the network aware of the pitfalls of security and the necessary security practices to minimise these risks. You can conduct the social-engineering tests to determine the user awareness. Until all the users are aware of certain factors related to the network, protection cannot be carried out in the true sense of the term.
- A firewall if not configured properly can act like an open door for any intruder. Hence it is vitally important to set the rules to allow traffic through the firewall that is important to the business. A firewall must have its own configurations depending upon the security aspect of your organization. From time to time proper analysis of the composition and nature of the traffic itself is also necessary to maintain security.
- Use strong password policies by having passwords of seven characters which are of secure length and relatively easy to remember. Passwords must be changed in every 60 days. The password should also be made up of both alpha and numeric characters to make it more unique.
- Since the comments used in source code contain both usernames and passwords, they must also be removed to make the network safe from attackers. All the comments in source code that look inaccessible to external users should also be removed as there are some techniques with the help of which a hacker can even view the source code of nearly all web applications.
- Many default, test and example pages are the most targeted pages for a hacker through which the entire network can be hacked. These pages can give an insight into the design of the network system and the vulnerabilities associated with them. Hence it is advisable to remove such pages from the network.
- The services that are either disabled or removed from the system cannot be used by any hacker to extract information related to the network. Hence, such services must be disabled or removed when not in use.
- Both intrusion detection systems and anti-virus software must be updated regularly and if possible on a daily basis. The updated version of anti-virus software is necessary as it helps in detecting even the latest virus.
- Apart from ensuring the internal security of the network, you need to think about the physical security of your organization. Until and unless your organization has full security, any intruder can simply walk in your office premises to gain whatever information he wants. Hence with technical security, you must also ensure that the physical security mechanisms of your organization are fully functional and effective.
How to Increase Router Security?
 Increase router security to stop hackers from stealing your vital information. Stop worrying and protect your wireless network.
- The first step to increase router security, is to change your admin password on your router. To do this, you need to login to your router. This is done by entering the IP address for your router into the address bar on your browser. Routers come with a factory default User ID and password to safeguard a router's configuration panel. D-Link and Netgear often use 192.168.0.1. Belkin routers regularly have 192.168.2.1. Click the Tools tab, then Admin button, and change the Administrator password.
- Disable SSID Broadcast. To do this, login into your router and click the Home tab, then the Wireless button, and choose the Disable button next to SSID Broadcast. The SSID is the name that of your network that you see when you are trying to connect to it. With SSID disabled, your router will be "invisible" to average users.
- Enable WPA Security. Click the Home button, then the Wireless button. From the Security pull-down, choose WPA. Do not use WEP. WEP can be hacked within 5 minutes with the proper programs. WEP only uses numbers while WPA can use Numbers and Letters. This makes it a lot hard for programs to hack your access code.
- If you mess up your router's settings, you can use the "Reset to Factory Settings" button typically found on a router's homepage. This will reset your router to the factory settings so that you can start over.
Monday, June 28, 2010
How to fix a printer paper jam?
Fixing a printer paper jam
When working with any printer it's inevitable that you'll encounter a paper jam. Below are the steps you'll want to follow when this occurs.
1. Turn off the printer.
2. Inspect the location or tray the printed paper ejects to. If the stuck paper is visible manually remove it.
3. Remove all paper trays and any paper that may be stuck between the tray and the printer. If the stuck paper is visible manually remove it.
4. Open the printer door that allows you access to the printer ink cartridges or toner and look for any stuck paper. If the stuck paper is visible manually remove it.
5. Turn the printer back on. If you continue to receive a printer jam error try repeating the above steps again. If issue still persist and you see no paper that is stuck in the printer it's likely your printer is experiencing another hardware issues and we suggest contacting the printer manufacturer for additional assistance and/or repair.
To manually remove paper pull on the paper with both hands being careful not to tear the paper while pulling it. If you're unable to get to an edge of the paper that allows you to pull it you may need to manually rotate the gears that feed the paper through the printer.
Preventing a printer paper jam
As mentioned earlier it is inevitable that you will encounter at least one paper jam during the life of your printer. However, if you're encountering frequent paper jams following the below steps can help prevent paper jams from occurring.
1. If your printer has a paper tray do not fill the tray to capacity. If you're encountering frequent paper jams reduce the amount of paper you place in the tray each time it is filled.
2. Make sure you or the tray feeding the paper into the printer is aligned properly and/or the slider used to hold the paper in place in the tray is snug with the paper. Many printers have sliders that allow different types and sizes of paper to be fed into the printer. If the slider is not properly positioned it can cause paper jams.
3. Use standard office paper; folded paper, paper with labels, and specialty paper such as hard bound paper can often cause paper jams. If you're uncertain with what type of paper you should use with your printer your printer documentation will list the types of paper compatible with your printer.
4. Do not mix the types of paper you're feeding into the printer at one time. If you need to change the type of paper or size of paper being used removed any other paper currently in the printer before inserting the new paper.
5. Examine the printer for any previous stuck paper in the printer. Previous paper jams, torn paper, printing labels or other foreign objects in the printer can cause reoccurring printer jams.
NTQP2CP36PPC
Thursday, June 24, 2010
How to Connect Two Computers to One Printer?
Choose your method for sharing the printer. You have the choice of establishing a network or setting up a print server. Setting up a print server requires more hardware in addition to setting up a network, while solely setting up a network cuts down on clutter in your office.
There are the steps to Follow to connect two computers to one printer:
There are the steps to Follow to connect two computers to one printer:
- Connect the primary, or first, computer to the printer. This is done traditionally with a printer cable linking the primary computer to the printer. If this is the first time the computer is hooked up to the printer, be sure to follow the manufacturer's instructions for installation and setup.
- Change the settings on the primary computer to allow sharing of the printer. Go through the control panel menu option, and select printers. Right-click on the printer selection and choose "Share printer." You are now able to share the printer with any other computers on your network.
- Connect the secondary computer to the printer. Access the shared printer option from the secondary computer. Select "network neighborhood" and locate the primary computer. Double-click on the primary computer, and the shared resources will become available. Double-click on the printer. You can now utilize the printer from both computers.
Wednesday, June 23, 2010
How to Make a Printer Wireless?
 Having the freedom to use your home desktop or laptop anywhere in your house and then printing without the worry of connecting to a device is a reality today with the right equipment and setup. There are many ways to configure your device to print wirelessly. Each has its own pros and cons and the costs vary accordingly.
- Obtain a wireless print server that is compatible with both your wireless network and your printer. While the printer’s documentation may not explicitly say that it is compatible with a print sever, many are compatible, and this can be verified by checking the website of the print server’s manufacturer. If you have a multifunction printer, only the print function will work with most wireless print servers, though a few have recently added support for scanning and the printer’s other functions.
- Read all of the documentation that came with the wireless print server. The manual will detail the specifics of the installation routine.
- Connect the printer to the wireless print server via the USB cable. Connect the print server’s AC adapter and turn the unit on.
- Connect an Ethernet cable between the wireless print server and your computer. This will be used for the initial setup only.
- Insert the CD supplied with the print server into your CD-Rom drive. Start the software if it does not start automatically. The application will walk you through the installation process, which includes setting the unit’s IP address, setting an access password, configuring it to connect to the wireless network, installing the drivers that allow the print server to use the printer and installing the print drivers on your computers.
- Choose how your print server will be addressed. Most units are set up to use dynamic addressing by default, which means that your wireless router will assign an IP address to it. This allows the server to be easily installed on the network, but it also means that the IP address of the printer may change over time. The other option is to assign a static IP address to your print server. This option is more reliable, because the print server will always use the same IP address, making it easier for the computers to find the printer and easier to access the print server’s online configuration application. If your router has the IP address of 192.168.0.1, for instance, set the print server to something like 192.168.0.2 or 192.168.0.3, as long as another device does not use that address.
- Set a password to be used to access the unit’s online configuration application.
- Configure the print server to access your wireless network. Give it the same SSID network name as your router and set it to use the same wireless channel. If encryption is used on the router, enable encryption on the print server, and enter the encryption key or password.
- Follow the instructions given by the print server’s software for installing printer drivers on the unit.
- Disconnect the Ethernet cable and allow the unit to connect via the wireless network.
- Install the printing drivers on each computer that will use the printer.
- Access the print server’s online configuration application to verify all settings by entering the IP address of the unit into a web browser, using the “http://192.168.0.2” format. Enter the administrator name and password.
Tuesday, June 22, 2010
How to Install a Printer Without a CD?
Become frustrated over a lack of CD to install a printer. Now it's not a difficult task. Follow such simple steps to make installation easy:
- Place the computer and printer next to each other and make sure that all the wires are connected to both the printer and the computer.
- Turn the computer on and wait for it to boot up.
- Plug the printer into the wall and then take the USB cord that is attached to the printer and plug it into the appropriate port on the computer.
- Turn the printer on.
- Click on "Start menu" and go to the "Control panel".
- Find "Printers and hardware" box and click on it.
- Take mouse and click "Add printer".
- When you see "Welcome to the add printer wizard," hit "Next."
- Click "Automatically detect and install plug and play printer" on the add printer wizard page. Click "Next."
- Installing the printer will begin if the network can automatically detect it. Otherwise, the message unable to detect will pop up and you will be prompted to install the printer manually. Click "Next."
- Select printer port. Use the recommended port for best set up options. Click "Next."
- Pick manufacturer and printer. Click "Next."
- Type a name or confirm name if it appears in the box and set printer as default printer if wish. Click "Next."
- Print a test page to be sure printer is set up and online. Click "Next."
- Receive a successful completion of installation of printer message. Click "Finish."
Sunday, June 20, 2010
How to Print on 4X6 Photo Paper?
There are several ways to print on 4-by-6 photo paper. When purchasing photo paper, be sure to verify that the type you buy will work with your printer. Some types of glossy photo paper may be able to work only with inkjet printers. If the printer paper is used on the wrong type of printer, it is possible the printer may be damaged.
Follow these Steps to Print On 4X6 Photo Paper:
Follow these Steps to Print On 4X6 Photo Paper:
- Open Microsoft Word.
- Add the picture or information that you want to print to the photo paper. To add a photo to Microsoft Word 2007, follow these steps; 1) Click the "Insert" tab; 2) Click the "Picture" option in the "Illustrations" section (the "Insert Picture" window will appear); and 3) Browse your computer for the picture you want to add. When you find the picture you want to add, click on the "Insert" button in the "Insert Picture" window. The picture will be added.
- Click the "Office" button. Select the "Print" option.
- Click on the "Properties" button.
- Select the "Photo Printing-Borderless" option under the "Printing Shortcuts" tab.
- Select the "Paper Sizes:" drop-down box and select the "Borderless 4x6in." tab option.
- Click the "OK" button. This takes you back to the "Print" window. Click the"OK" button again. Your photo will print.
Friday, June 18, 2010
How To Fix Script Errors In Internet Explorer?
Method 1: Disable script debugging
If the only sign of a problem is the error message, and Web sites are working, you can probably ignore the error. Also, if the problem only happens on one or two Web pages, it might be a problem with those pages. If you decide to ignore the errors, you can disable script debugging.
Note If this problem occurs on more than one or two sites, do not disable script debugging. Go to method 2 now.
To turn off the Scripting Debugger in Internet Explorer 6, follow these steps:
1. On the Tools menu, click Internet Options.
2. On the Advanced tab, click to select the Disable script debugging check box. and then click OK .
To turn off notification about every script error in Internet Explorer 7, follow these steps:
1. On the Tools menu, click Internet Options.
2. On the Advanced tab, click to clear the Display a notification about every script error check box, and then click OK.
Method 2: Test a Web page from another user account, another browser, and another computer:-
Use another user account, another browser, or another computer to view the Web pages that triggered a script error to determine whether the problem persists. If the script error persists, there may be a problem with the way the Web page is written. You can probably ignore the error and disable script debugging as described in method 1.
If the script error does not occur when you view the Web page from another user account, browser, or computer, the problem may be caused by files or by settings on your computer. Go to method 3 to continue to troubleshoot.
Method 3: Verify that Active Scripting, ActiveX, and Java are not being blocked by Internet Explorer:-
Active scripting, ActiveX, and Java are all involved in shaping the way information displays on a Web page. If these are blocked on your computer, it may disrupt the display of the Web page. Reset the Internet Explorer security settings to make sure these are not blocked. To do this, follow these steps:
1. Start Internet Explorer.
2. On the Tools menu, click Internet Options.
3. In the Internet Options dialog box, click the Security tab.
4. Click Default Level.
5. Click OK.
Note ActiveX controls and Java programs are turned off at the High security level in Internet Explorer.
Try to open a Web page where you previously received a scripting error. If you do not receive the error, the issue is resolved. If the issue persists, go to Method 4.
Method 4: Remove all the temporary Internet-related files
Every time that you open a browser to view a Web page, your computer stores a local copy of that Web page in a temporary file. If the size of the temporary Internet files folder becomes too large, some display problems may occur when you open Web pages. Periodically clearing the folder might help resolve the issue.
To remove all the temporary Internet-related files from your computer when you use Internet Explorer 6, follow these steps:
1. Start Internet Explorer.
2. On the Tools menu, click Internet Options.
3. Click the General tab.
4. Under Temporary Internet files, click Settings.
5. Click Delete Files, and then click OK.
6. Click Delete Cookies, and then click OK.
7. Under History, click Clear History, and then click Yes.
8. Click OK.
To remove all the temporary Internet-related files from your computer when you use Internet Explorer 7, follow these steps:
1. Start Internet Explorer.
2. On the Tools menu, click Internet Options.
3. Click the General tab.
4. Under Browsing History, click Delete, and when you are prompted, click Yes to confirm.
5. In the Delete Browsing History dialog box, under Temporary Internet Files, click Delete Files, and when you are prompted, click Yes to confirm.
6. Under Cookies, click Delete Cookies, and when you are prompted, click Yes to confirm.
7. Under History, click Delete History, and when you are prompted, click Yes to confirm.
8. Click Close, and then click OK to close the Internet Options dialog box.
Source: support.microsoft.com/kb/308260
Thursday, June 17, 2010
How to Access Wireless Router Settings?
 Accessing your wireless router's settings allows you to make changes to your wireless network's configuration and can help you to better secure your network. By connecting your computer locally to your router, you can view and update all of your router configurations directly through your computer's web browser. Although it can seem technically challenging to adjust your router settings, it is actually very simple to do and can be done in just a few minutes.
Follow these steps to Access your Router Settings:
- Connect your computer to the wireless router. Although you can access the router wirelessly, it is better to use an Ethernet cable to directly connect to your router so that you can securely adjust router settings. Plug the Ethernet cable into the appropriate Ethernet jack on your computer. Plug the other end of the cable into any one of the open Ethernet ports on the back of your wireless router.
- Open your computer's web browser. In the URL address field, enter the IP address for your wireless router. This information should be contained in your router's manual. If you cannot find it, enter "198.168.1.1" as the address. This is usually the default IP address for most routers.
- Enter the username and password for your router. This should also be supplied in the router's manual. If you don't have this information, go to routerpasswords.com and find the brand and model of your router. This site lists the default login information for most wireless routers.
- You should now be able to see your wireless router settings. You can configure your network ports, as well as SSID (wireless network name) and passwords.
Sunday, June 13, 2010
4 Most Common Computer Problems and their Solutions
There are thousands of problems that your PC could have, from an endless list of possible error messages to various hardware failures. Most of those problems might have several possible causes as well.
Luckily, the majority of these potential issues are rare. The problems most computer users see are common errors and failures seen by many, many others.
Below is a list of some of the most common PC problems:
Computer Won't Turn On
Finding that your PC won't boot is a very, very common problem. Whether you mean that the computer is completely dead or it powers on but nothing happens, the result is the same - you can't use your computer at all. It's scary.
Luckily there's a lot you can do to troubleshoot this problem.
Blue Screen of Death (BSOD)
There's a good chance you've heard of or seen the Blue Screen of Death. It's that all-blue screen with the computer code all over it that comes up as your computer "dies." It's actually caused a STOP Error and there are many different kinds. STOP 0x0000008E and STOP 0x0000007B are two of the more common Blue Screen of Death errors.
Browse through my complete list of STOP codes to find specific troubleshooting informatoin for the BSOD that you're seeing.
"404" / "Page Not Found" Error
A 404 error means that whatever page you tried to reach on the Internet isn't there. Usually this means that you didn't type the correct address in the browser or that the link you used to try to access the page was wrong.
Regardless of the reason, there are several things you can try to get past this common error.
"Hal.dll is Missing" Error
Error messages about missing DLL files are unfortunately very common but the "Hal.dll is Missing" error is one of the more common (and frustrating) ones. There are a lot of possible causes for this problem, meaning there are several troubleshooting steps you'll need to follow to cover all your bases.
Fortunately they're easy steps and with a little patience you'll have your computer back in no time.
Thursday, June 10, 2010
How To Install a Printer on Home Network?
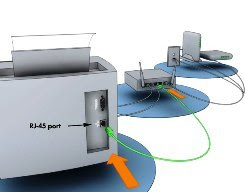 The most common way to install a printer on a home network is to install it as a stand-alone device on the network, and then add a connection to the printer on each computer that is on the network.
If you're not sure what type of network printer to install, decide if you want to:
1. Use a wireless printer. These printers use a built-in wireless card and plug into a power source, not your network or computer. After you turn on the printer, you need to refer to the information that came with the printer to set up a wireless connection to each computer on a home network. Security options for wireless printing are determined by each printer manufacturer.
2. Connect a printer directly to the network. To do this, you need to plug in the printer to your network hub or router. How to install these printers depends on whether the printer and your network device use an Ethernet, universal serial bus (USB), or another type of connection. You also need to refer to any installation information or tools provided by the printer manufacturer.
3. Connect more than one printer directly to the network. To do this, your hub or router must be able to support more than one printer connection.
To install a network printer:
1. To find out how to install a network printer, check the information that came with the printer.
To connect to a network printer :
After you have installed a network printer, you need to add a connection to the printer for each computer on the network.
1. Open Printers by clicking the Start button Picture of the Start button, clicking Control Panel, clicking Hardware and Sound, and then clicking Printers.
2. On the toolbar, click Add a printer.
3. In the Add Printer Wizard, select Add a network, wireless or Bluetooth printer, and then follow the steps in the wizard.
Monday, June 7, 2010
Fix Windows 7 Black Screen Error
1. Restart your PC
2. Logon and wait for the black screen to appear
3. Make sure your PC should be able to connect to the internet (black screen does not appear to affect this)
4. Press the CTRL, ALT and DEL keys simultaneously
5. When prompted, Click Start Task Manager
6. In Task Manager Click on the Application Tab
7. Next Click New Task
8. Now enter the command:
“C:\Program Files\Internet Explorer\iexplore.exe”
(Download Patch file) “http://info.prevx.com/download.asp?GRAB=BLACKSCREENFIX”
Note this command assumes that you are using internet explorer as your browser, if not substitute your browser path and file details for those of iexplore.exe or use the Browser option of Task manager to locate it.
9. Click OK and your browser should start up and begin the download process
10. When prompted for the download Click run, the black screen fix program will download and run to automatically fix the issue.
11. Now restart your PC and the black screen problem will hopefully be gone.
How to Configure the Router?
Open your web browser, type " http://192.168.1.1/ " into the address bar and hit "Enter."
Use "Admin" as the username in the pop-up box and leave the password blank.
Connect to the Internet and click on "Internet Setup."
Select your connection type from the drop-down menu. Choose "DHCP" for cable modems or PoE" for most DSL modems. If you are unsure of these options, check with your ISP.
Set a service set identifier (SSID) to identify the router and change the password.
Encrypt your wireless connection using a Wireless Encryption Protocol (WEP) key. Under the "Wireless Security" option, enter a passphrase and click "Generate." This will generate a password which will need to be used by any client connecting to your router.
Friday, June 4, 2010
How to Erase a Saved Password from an Email Account?
In Internet Explorer:
From your desktop, click to open up Internet Explorer.
Click on the "Tools" button on the menu bar. This option is in the upper left-hand corner of the web browser, directly underneath the address bar that displays the URL of the current webpage. From the drop-down menu that appears, click on the last option available, "Internet Options."
Click the button labeled "Delete" under the heading "Browsing history." In the window that pops up, click to check the box next to "Passwords." Proceed to click the button at the bottom of the window marked "Delete." Upon clicking this button, a window will pop up showing the browser's progress in deleting the saved passwords, and close automatically once complete.
In Mozilla Firefox:
From your desktop, click to open up Mozilla Firefox .
Click on the "Tools" button that appears on the menu bar located directly above the address bar. From the drop-down menu, click on the option labeled "Clear recent history."
Click on the button to the left of "Details." In the menu that appears, check the "Cache" and "Active Logins" boxes and click "Clear now." Firefox will clear the cache and close the window.
In Google Chrome:
From your desktop, click to open up Google Chrome.
Click the menu bar labeled "Tools" in the upper right hand corner of the Google Chrome browser. From the drop down menu, select the "Options" button, and click on the tab labeled "Personal Stuff." In this tab, click "Clear browsing data" from the list of options.
On the "Clear browsing data" screen, click on the "Passwords" box to select it. Click the button labeled "Clear Browsing Data."
Thursday, June 3, 2010
What's the difference between Spyware, Malware, Adware, & Trojan horses (& other viruses)?
*Virus is a program to cause damage to computer.
*Trojan is a program which is used to gain access to a computer by installing a program on infected PC to open some backdoor. [Trojans are also known as Backdoors].
*Worm is a program which infects the computers which are connected by some network. Worms slow down the network.
* Spywares are the program which are used to monitor/Log the activity performed on a computer. These are used to spy on some one either for legal or illegal perpose. Example: Keylogger applications.
* Adwares are the programs which delivers ads to your computer (generally in POP-UP's form). They consume your network.
*Malwares are the program with malicious intention. It can be damaging your computer, spying on you or any other malicious task.
Wednesday, June 2, 2010
How to remove Antispyware 2010?
From an uninfected computer, download Malwarebytes' Anti-Malware and the Registry Key Fix program.
Copy the downloaded files onto your USB flash drive. If you do not have a flash drive, you can alternately download the files and burn them to a disc. With the rogue program running, insert the USB flash drive or disc into the infected computer.
First, run the Registry Key Fix program. When Windows prompts whether or not you want to allow the data to be added to your computer, click on the Yes button.
Next, run the Malwarebytes' Anti-Malware setup. When the installation begins, keep following the prompts in order to continue with the installation process. Do not make any changes to default settings and when the program has finished installing, make sure you leave both the Update Malwarebytes' Anti-Malware and Launch Malwarebytes' Anti-Malware checked. Then click on the Finish button.
The program should automatically start after you hit the Finish button. You will see a message stating that you should update the program before performing a scan. Allow the updates to download. Once completed, you can click on the OK button and then you will be presented with the main screen of the program.
On the Scanner tab, make sure the the Perform Full Scan option is selected and then click on the Scan button to start scanning your computer for the rogue programs and any associated files.
Malwarebytes' Anti-Malware will now start scanning your computer for malware. Depending on the speed of your computer, this process can take anywhere from 5-15 minutes. When it is complete, a message box will appear stating "The scan completed successfully. Click 'Show Results' to display all objects found." Click the OK button.
You will now be back at the main Scanner screen. At this point you should click on the Show Results button. A screen displaying all the malware that the program found will be displayed.
Make sure that all of the check-boxes next to each of the "Vendor" names are checked and click on the Remove Selected button.
When the program has finished removing the malware from your computer, it will open a scan log and display it in Notepad. Review the log if you want, and then close it.
Close Your computer should now be malware-free and infection-free. You can remove the Malwarebyte's Anti-Malware program from your computer if you like, but you should keep the files on your flash drive or keep the disc that contains the files, in case of future infections.


