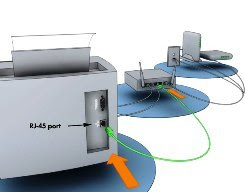
 The most common way to install a printer on a home network is to install it as a stand-alone device on the network, and then add a connection to the printer on each computer that is on the network.
If you're not sure what type of network printer to install, decide if you want to:
1. Use a wireless printer. These printers use a built-in wireless card and plug into a power source, not your network or computer. After you turn on the printer, you need to refer to the information that came with the printer to set up a wireless connection to each computer on a home network. Security options for wireless printing are determined by each printer manufacturer.
2. Connect a printer directly to the network. To do this, you need to plug in the printer to your network hub or router. How to install these printers depends on whether the printer and your network device use an Ethernet, universal serial bus (USB), or another type of connection. You also need to refer to any installation information or tools provided by the printer manufacturer.
3. Connect more than one printer directly to the network. To do this, your hub or router must be able to support more than one printer connection.
To install a network printer:
1. To find out how to install a network printer, check the information that came with the printer.
To connect to a network printer :
After you have installed a network printer, you need to add a connection to the printer for each computer on the network.
1. Open Printers by clicking the Start button Picture of the Start button, clicking Control Panel, clicking Hardware and Sound, and then clicking Printers.
2. On the toolbar, click Add a printer.
3. In the Add Printer Wizard, select Add a network, wireless or Bluetooth printer, and then follow the steps in the wizard.


1 comments :
Hi there. Nice blog. You have shared useful information. Keep up the good work! This blog is really interesting and gives good details. Home Network Setup
Post a Comment