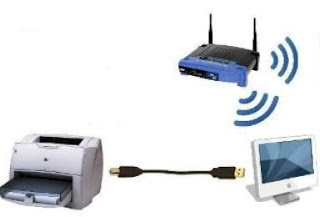
Having the freedom to use your home desktop or laptop anywhere in your house and then printing without the worry of connecting to a device is a reality today with the right equipment and setup. There are many ways to configure your device to print wirelessly. Each has its own pros and cons and the costs vary accordingly.
- Obtain a wireless print server that is compatible with both your wireless network and your printer. While the printer’s documentation may not explicitly say that it is compatible with a print sever, many are compatible, and this can be verified by checking the website of the print server’s manufacturer. If you have a multifunction printer, only the print function will work with most wireless print servers, though a few have recently added support for scanning and the printer’s other functions.
- Read all of the documentation that came with the wireless print server. The manual will detail the specifics of the installation routine.
- Connect the printer to the wireless print server via the USB cable. Connect the print server’s AC adapter and turn the unit on.
- Connect an Ethernet cable between the wireless print server and your computer. This will be used for the initial setup only.
- Insert the CD supplied with the print server into your CD-Rom drive. Start the software if it does not start automatically. The application will walk you through the installation process, which includes setting the unit’s IP address, setting an access password, configuring it to connect to the wireless network, installing the drivers that allow the print server to use the printer and installing the print drivers on your computers.
- Choose how your print server will be addressed. Most units are set up to use dynamic addressing by default, which means that your wireless router will assign an IP address to it. This allows the server to be easily installed on the network, but it also means that the IP address of the printer may change over time. The other option is to assign a static IP address to your print server. This option is more reliable, because the print server will always use the same IP address, making it easier for the computers to find the printer and easier to access the print server’s online configuration application. If your router has the IP address of 192.168.0.1, for instance, set the print server to something like 192.168.0.2 or 192.168.0.3, as long as another device does not use that address.
- Set a password to be used to access the unit’s online configuration application.
- Configure the print server to access your wireless network. Give it the same SSID network name as your router and set it to use the same wireless channel. If encryption is used on the router, enable encryption on the print server, and enter the encryption key or password.
- Follow the instructions given by the print server’s software for installing printer drivers on the unit.
- Disconnect the Ethernet cable and allow the unit to connect via the wireless network.
- Install the printing drivers on each computer that will use the printer.
- Access the print server’s online configuration application to verify all settings by entering the IP address of the unit into a web browser, using the “http://192.168.0.2” format. Enter the administrator name and password.
 Having the freedom to use your home desktop or laptop anywhere in your house and then printing without the worry of connecting to a device is a reality today with the right equipment and setup. There are many ways to configure your device to print wirelessly. Each has its own pros and cons and the costs vary accordingly.


2 comments :
Hello Shipra...
Would you like to Join us on http://techboyarena.blogspot.com/
If you are interested then please contact us at techboyarena@gmail.com
We would love to have you in our community....
Making your printer wireless is very easy but if your are finding is difficult, you should look for IT expert. IT expert can help you lot in making your printer wireless.
IT support central coast
http://itlocal.com.au/
Post a Comment